Growing Sprouts

I have fond childhood memories of going out for lunch after Sunday church to Dale’s (Duff’s) Smorgasbord in Gallipolis, OH. To me the coolest thing wasn’t the rotating buffet but the salad bar. On the salad bar they had alfalfa sprouts. Being a weird kid the preferred vegetables over sweets, I would always pile my plate high with alfalfa sprouts and those little ears of corn. As a kid, I always wondered how those sprouts were grown.
Sprouts are simply the beginning growth of a seed. It isn’t that much different than the microgreens we featured last week. The two main differences being that sprouts are grown without soil and they are eaten a bit earlier. Seeds are difficult to digest, but sprouts turn the nutrients of a seed into a form our bodies can easily use.
Sprouts provide enzymes, chlorophyll, nutrients, and a freshness that we usually miss during the winter months. Ancient Chinese physicians were prescribing sprouts curatively over 5,000 years ago. In the 18th century sailors grew sprouts to stave off scurvy on long passages. They can be grown quickly and easily indoors any time of the year. To grow your sprouts you’ll really just need two things – a sprouter and seeds.

When you purchase seeds make sure they are labelled as “sprouting” seeds. Some dry bean seeds, like lentils, that are intended to be cooked don’t have a verified germination rate since they’re not intended to be grown. Also, I recommend storing the seeds in your refrigerator to extend the shelf life.
When it comes to sprouting equipment you can spend as little as $5 on a mason jar and some screen or as much as $100 on a fancy clay sprouter. Personally, I use a 4-tier plastic sprouter that is designed to allow water to trickle down from the top. The nice thing about this system is that I can start a tray every couple days to have a constant supply of sprouts. Although, this could easily be done with multiple mason jars too. Here’s how to get started.
Wash the seeds or beans. Place one or two tablespoons of seeds in a quart jar. (We’ll go with the jar method for the sake of this instructional.) Make sure they don’t take up more than a quarter of the jar; they will expand quite a bit. Cover with a few inches of water and secure a mesh or cheesecloth on top. Let soak for 8 to 12 hours at room temperature.
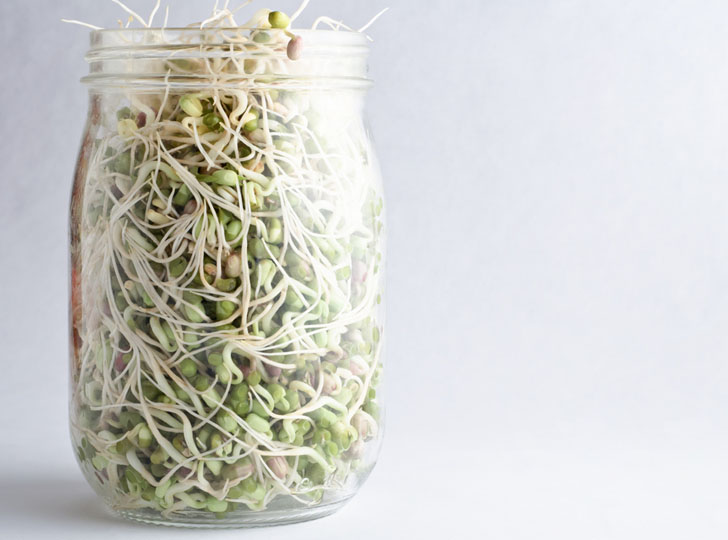
Drain the seeds and rinse them, then drain again. Find an area out of direct sunlight and place the jars upside-down, but at an angle to allow drainage and air-circulation through the mesh. You can get a custom sprouting rack or try a dish rack or just a bowl.
Rinse and drain the seeds between two and four times a day, making sure that they never dry out completely.
As soon as they are big enough, harvest! This generally takes from three to seven days – and as little as one day – depending on what you’re sprouting. Lentils and mung beans, for instance, may just take a day or two. Sprouts are at their best when they’re still on the relatively small side and just starting to turn green.
Give them a final rinse and allow them to drain very well in a colander, removing any unsprouted seeds. Once they are dry, store them in a covered bowl and use within a week. All sprouts can be eaten raw, and all but the most delicate (like alfalfa) can be gently cooked as well.
