How to Press Flowers
This post was contributed by and originally published on FTD by Design.
Pressing flowers is a fun way to keep your favorite plants around throughout the whole year. There are four main ways that you can press flowers. The first, and most common, is to use a flower press. Flower presses come in all shapes and sizes. You can buy a small one or create a larger sized one as seen in Bob’s Market Live Series. The second most common method is to use a thick book to press flowers. This can be done with any type of book, but it’s suggested that you line the pages with parchment paper to prevent the ink from bleeding onto the petals.
The last two methods are less common but much faster. One is to use an iron and warm the flowers between two pieces of parchment paper. By pressing the flower a few seconds at a time, the petals will dry out but not burn. The last way to press flowers is to place them under a plate in the microwave. Heating them for 20-30 seconds at a time will allow the flowers to dry out.
FTD has created a guide on how to press flowers that walks you through each step. After you’re done pressing your flowers, try putting them on display by framing them. Creating a DIY botanical frame will add a fresh touch to your living space and you’ll be able to enjoy your favorite flower all year long!

Pressed flowers can be used to personalize any decor or gift. Want to add a unique floral element to your home? Keep your favorite flowers on display all year round by pressing them and creating a DIY botanical print. Giving a gift to someone meaningful? Add pressed flowers in the card to make it extra special.
We’ll show you how to properly press your favorite flowers and transform them into a beautiful statement of decor.
How to press flowers
Pressing flowers can be done a few different ways. The method you choose will depend on the materials you have on hand and how many flowers you are pressing. If you are making a variety of prints, you might consider purchasing or creating your own flower press, while a book will do if you are only pressing a few.
Choosing the right flowers
It’s important that you are using the correct flowers so that you get the best results. Some of this will be trial and error, but following these rules will help. Try choosing a variety of focal flowers and greenery and filler flowers for a unique look.
Some things to consider when choosing your flowers:
- Pick your flower right when it blooms. The color will fade when it’s pressed, so catch the flower at its prime for the most colorful print.
- The flowers should also be in prime condition, free of blemishes or tears.
- Pick flowers that have already been dried out from the sun. Wet plants are prone to mold.
- Choose flowers that have a flat bud. If the bloom is globe shaped, you can cut it in half so that it’s easier to press.
How to press flowers with a book
Everyone has old books lying around the house, so why not put them to use?
Materials:
- Flowers
- Heavy book
- Absorbent paper (parchment paper, coffee filters, thin cardboard)
- Weight (can just be more books)
Directions:
Step 1: Begin by preparing your flower. Remove any unwanted leaves and lay flat on parchment paper.
Step 2: Open the book and place absorbent paper on the book’s pages. Large books like dictionaries and phone books work best for this because they are heavy and have many pages you can use. Make sure you choose a book that you don’t mind getting damaged. There is a chance that the water from the flower may cause the book pages to wrinkle.
Step 3: Position the blooms face down on parchment paper. Carefully close the book, making sure not to move the flowers.
Step 4: Place more books or other weighty objects on top of the book. Keep in a place that is out of the way and not likely to be knocked into.
Step 5: Let the flowers sit for 3-4 weeks. The longer you press the flowers, the less water will be left in them. Give them two to three weeks before removing from the book. If they don’t have a papery feel, change out the parchment paper and let them sit for longer.
Once you’ve created your pressed flowers, you can put them on display!
How to press flowers with a flower press
Flower presses are designed specifically to create pressed flowers. They consist of layers of paper held between two stronger boards and are held together by bolts and wingnuts.
Materials:
- Flowers
- Flower press
- Parchment paper
Directions:
Step 1: Prepare your flowers by removing any unwanted leaves.
Step 2: Unscrew the wingnuts from the bolts. Take the top off the press so that the paper is face up.
Step 3: Line the wood with with parchment paper. This way you can re-use the press without having to clean it.
Step 4: Place your flowers on the absorbent paper. Carefully replace the top. Screw the wingnuts back on and tighten.
Step 5: Let sit for three to four weeks. To prevent browning, replace the parchment paper a few times in that time. Once they are completely dry, the flowers can be removed from the press and used for decor.
How to press flowers in a microwave
Microwave presses function similarly to the original flower press, but they don’t have metal on them so they can be heated in the microwave. This process is faster, creating a dry flower in a matter of minutes rather than days.
These microwave presses can be made or bought. The purchased ones are specially designed with vents that allow steam to escape, drying the flower faster. The DIY ones can be done with common kitchen items!
Materials:
- Flowers
- Microwavable plate
- Absorbent paper (parchment paper, coffee filters, thin cardboard)
Directions:
Step 1: Place your flowers face down on a piece of parchment paper. Place another piece of parchment paper on top of the flowers.
Step 2: Put the parchment paper and flowers on your microwave tray. Place the plate on top.
Step 3: Turn the microwave on low for thirty seconds to a minute. Check the results and then repeat until you are satisfied with how dry the flower is.
Warning: The plate shouldn’t get too hot, but do a touch test before grabbing the whole plate.
How to press flowers with an iron
Pressing flowers with an iron is another way to speed up the process. It is similar to the process of using iron-on appliques, but you aren’t attaching the flower to anything.
Materials:
- Flowers
- Parchment paper
- Iron
- Book
Directions:
Step 1: Place your flowers between two pieces of parchment paper. Place a book on top to flatten the flowers and make them easier to iron.
Step 2: Turn your iron on low. Make sure you don’t use any water or steam features.
Step 3: Once the iron is warm, remove the book from the parchment paper. Move the paper and flowers to an ironing board.
Step 4: Press the iron on the paper for about 15 seconds. Remove until the paper is cool again (about 15 more seconds). Repeat this process until the flower is dried.
How to create a DIY botanical print
Now that you know how to press flowers, it’s time to display all the beautiful varieties you’ve created.
Materials:
- Pressed flowers
- Glass frame
- Paper towel
Step 1: Clean your frame.
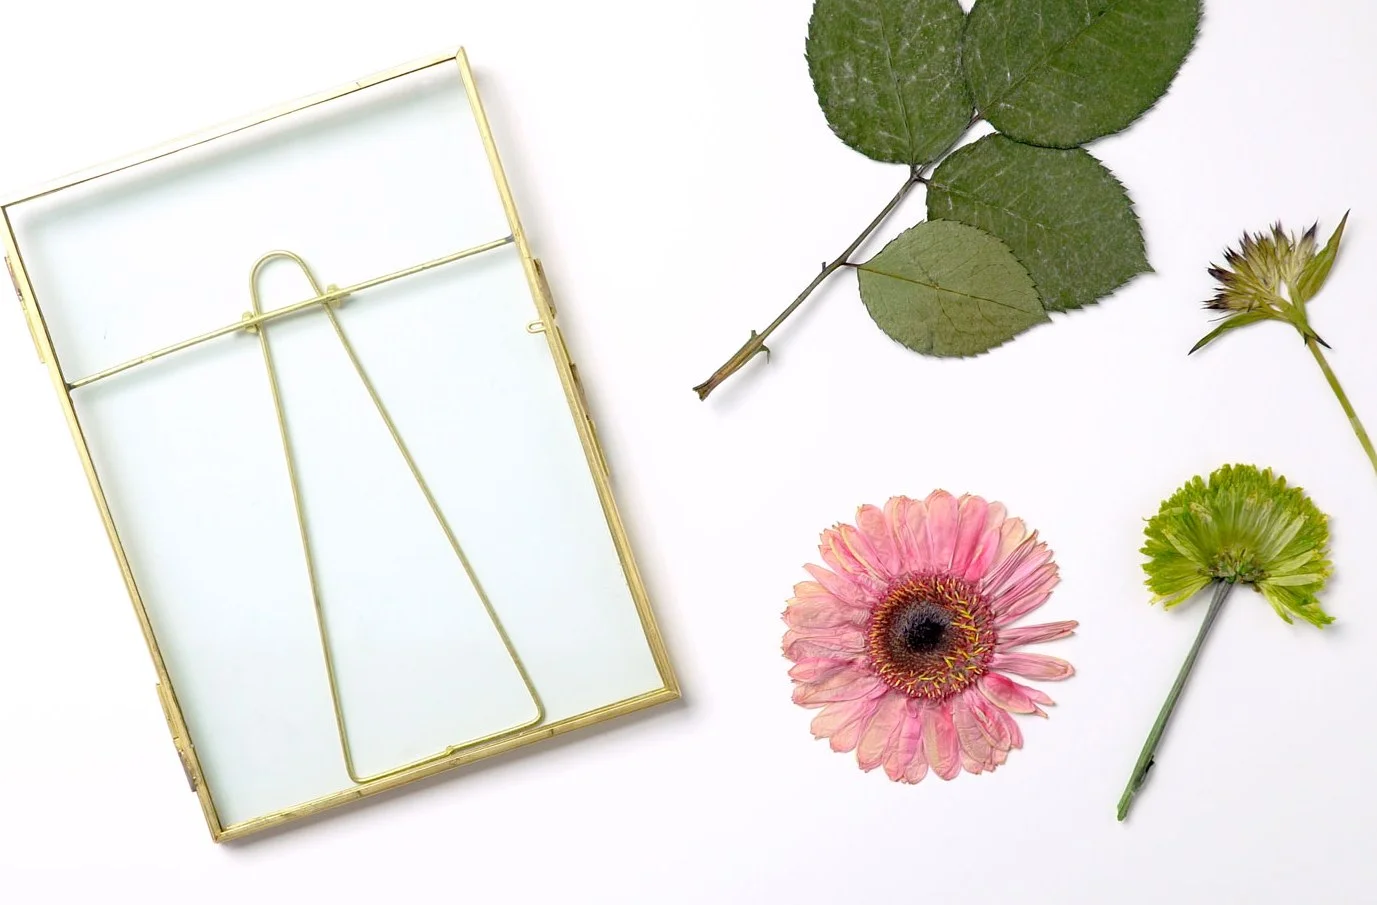
Make sure the glass frame is spotless before using it. Remove the backing and wipe it down with a damp paper towel. Avoid using a cleaning solution because it may react with the pressed flowers and ruin them. Let the frame dry completely before using.
Step 2: Create a design with your pressed flowers.
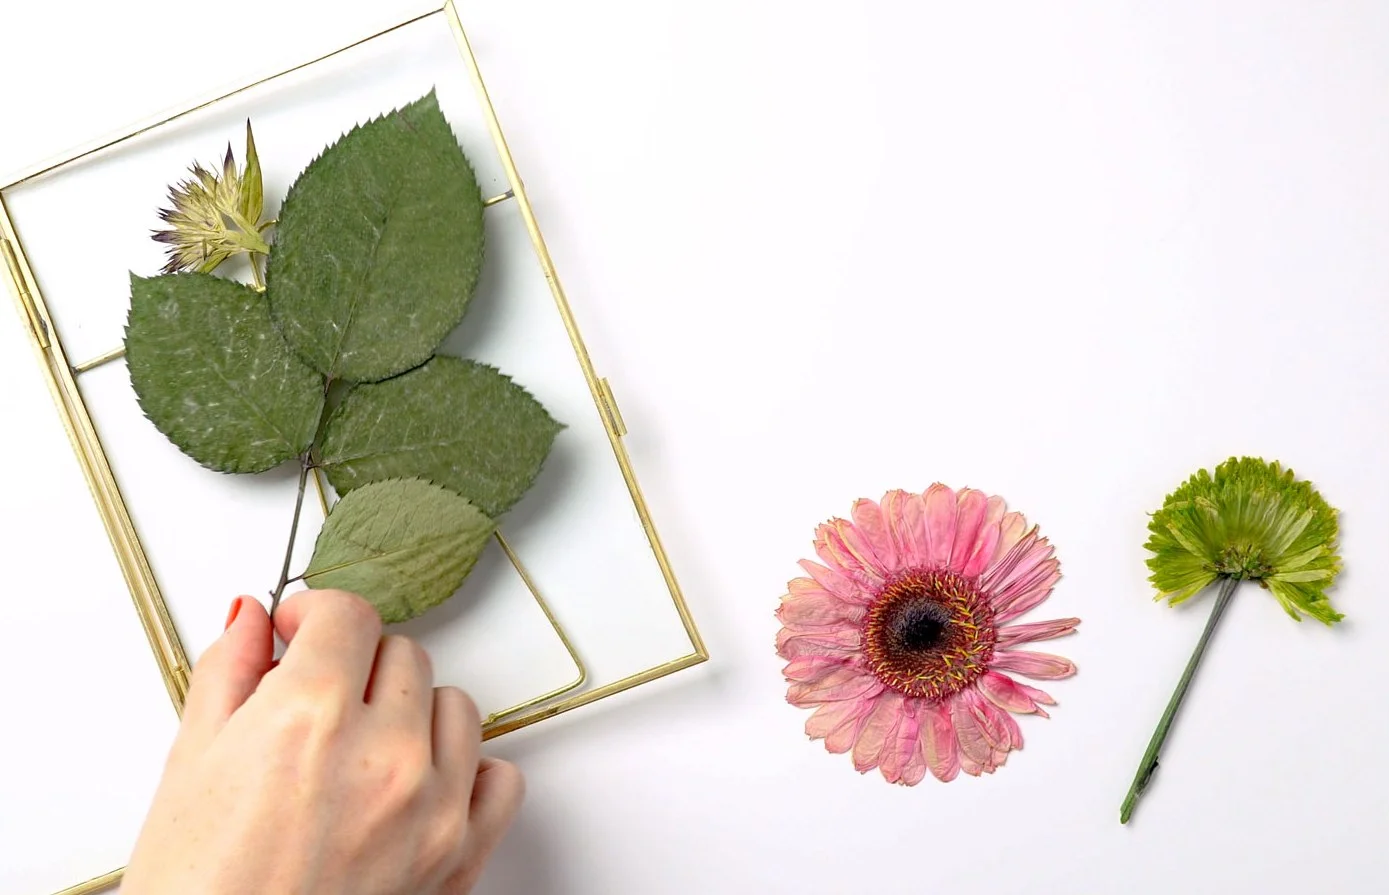
This is where you get to be creative! There are endless possibilities when it comes to framing flowers. Try a unique pattern or a cute shape like a heart. You can decide to use just the flower buds or keep the stem for a more natural look. Make sure the flowers are facing down when you arrange them in the frame.
Step 3: Carefully return the back to the frame.

Place the back on the frame, taking care not to move your flower pattern. Secure the back. If the flowers aren’t in their desired place, remove the back and adjust them until perfect.
Step 4: Display for everyone to admire!

You’ve created a piece of decor that no one else has. Put this unique piece on display in your home or give it as a gift to someone who loves flowers as much as you do.
Pressed flowers can be used in many ways. From botanical prints to crafting cards, they add a unique touch to whatever they are included in. Try adding pressed flowers to a thank you gift to show the recipient how grateful you are.
To make things even easier for you, we’ve created a shareable how-to guide so that you can visualize the process. If you find it helpful, download our guide on how to create a botanical print and share it with your friends and family.
This post was contributed by and originally published on FTD by Design.
Video and images courtesy of FTD.