Pressing Plant Specimens

Have you ever studied a leaf or flower closely? They are beautiful! The patterns formed by their veins, their unique outlines, and their radiant color in autumn make them something worth collecting. Collecting and pressing plant specimens is a hobby many people enjoy.
Taxonomy is the science that finds, describes, classifies, and names living things. Plant taxonomy focuses on plants. One of the methods that taxonomists use is pressing plants to catalog them in a “herbarium,” which is a systematically organized collection of dried plant specimens. One of the largest herbariums in the region belongs to Marshall University. Nancy Brown, our recently retired HR Manager, actually has specimens on file there from her undergraduate days at Marshall (see below). In recent years Marshall has worked to digitize their collection to help make it available for anyone to study.

You might not be interested in collecting plants to identify them using the scientific nomenclature (those weird names scientists use), but you might be interested in creating a beautiful display for your home by framing specimens. Framing a specimen begins the same as the herbarium process, with a plant press.
A plant press is a simple set of two frames, typically 18 inches by 12 inches, which the plant specimens are sandwiched between for pressing. The key with a press is not only pressure but also drying. Between the frames, specimens are layered between paper, cardboard, and sometimes blotting paper for items with a higher moisture content. If you are collecting specimens to identify them you will also want a field notebook, a container to collect specimens in, and some way of tagging samples.
the pressing process:

Select your specimen. Tag it in the field and assign it a number. Record the number on the tag and in your field journal, along with notes about where you found it, when, and any other observations that might help with identification.
Bring the specimen back home either in a rigid container (to keep it from being crushed) or a plastic bag. A moist paper towel in the container will help prevent the plant from wilting. If you have taken a plant press along, you can proceed with the next steps right in the field.
To press the specimen, clean up the plant. Brush off loose soil and blot off moisture.
Arrange the plant on a sheet of newspaper. Next to it, place the identification tag with its name, a number you have assigned to it, the location where it was collected, when it was collected, and by whom. Make sure the same information is in your journal. Place another piece of newspaper on top of the plant.
Make layers. Place the pieces of newspaper with your specimen inside between two pieces of blotting paper, then between two pieces of corrugated cardboard, to allow air to circulate.
Place the resulting package in the plant press and gently screw it down. As an alternative, you can hold it securely together with straps, or place some heavy objects (books, bricks) on top.
You can dry several plants in the press at one time. Each should be arranged in the same layers as described above.
Check the plants every two or three days, and replace the damp papers with dry ones. It will take from two to four weeks before the specimens are completely dry.

mounting:
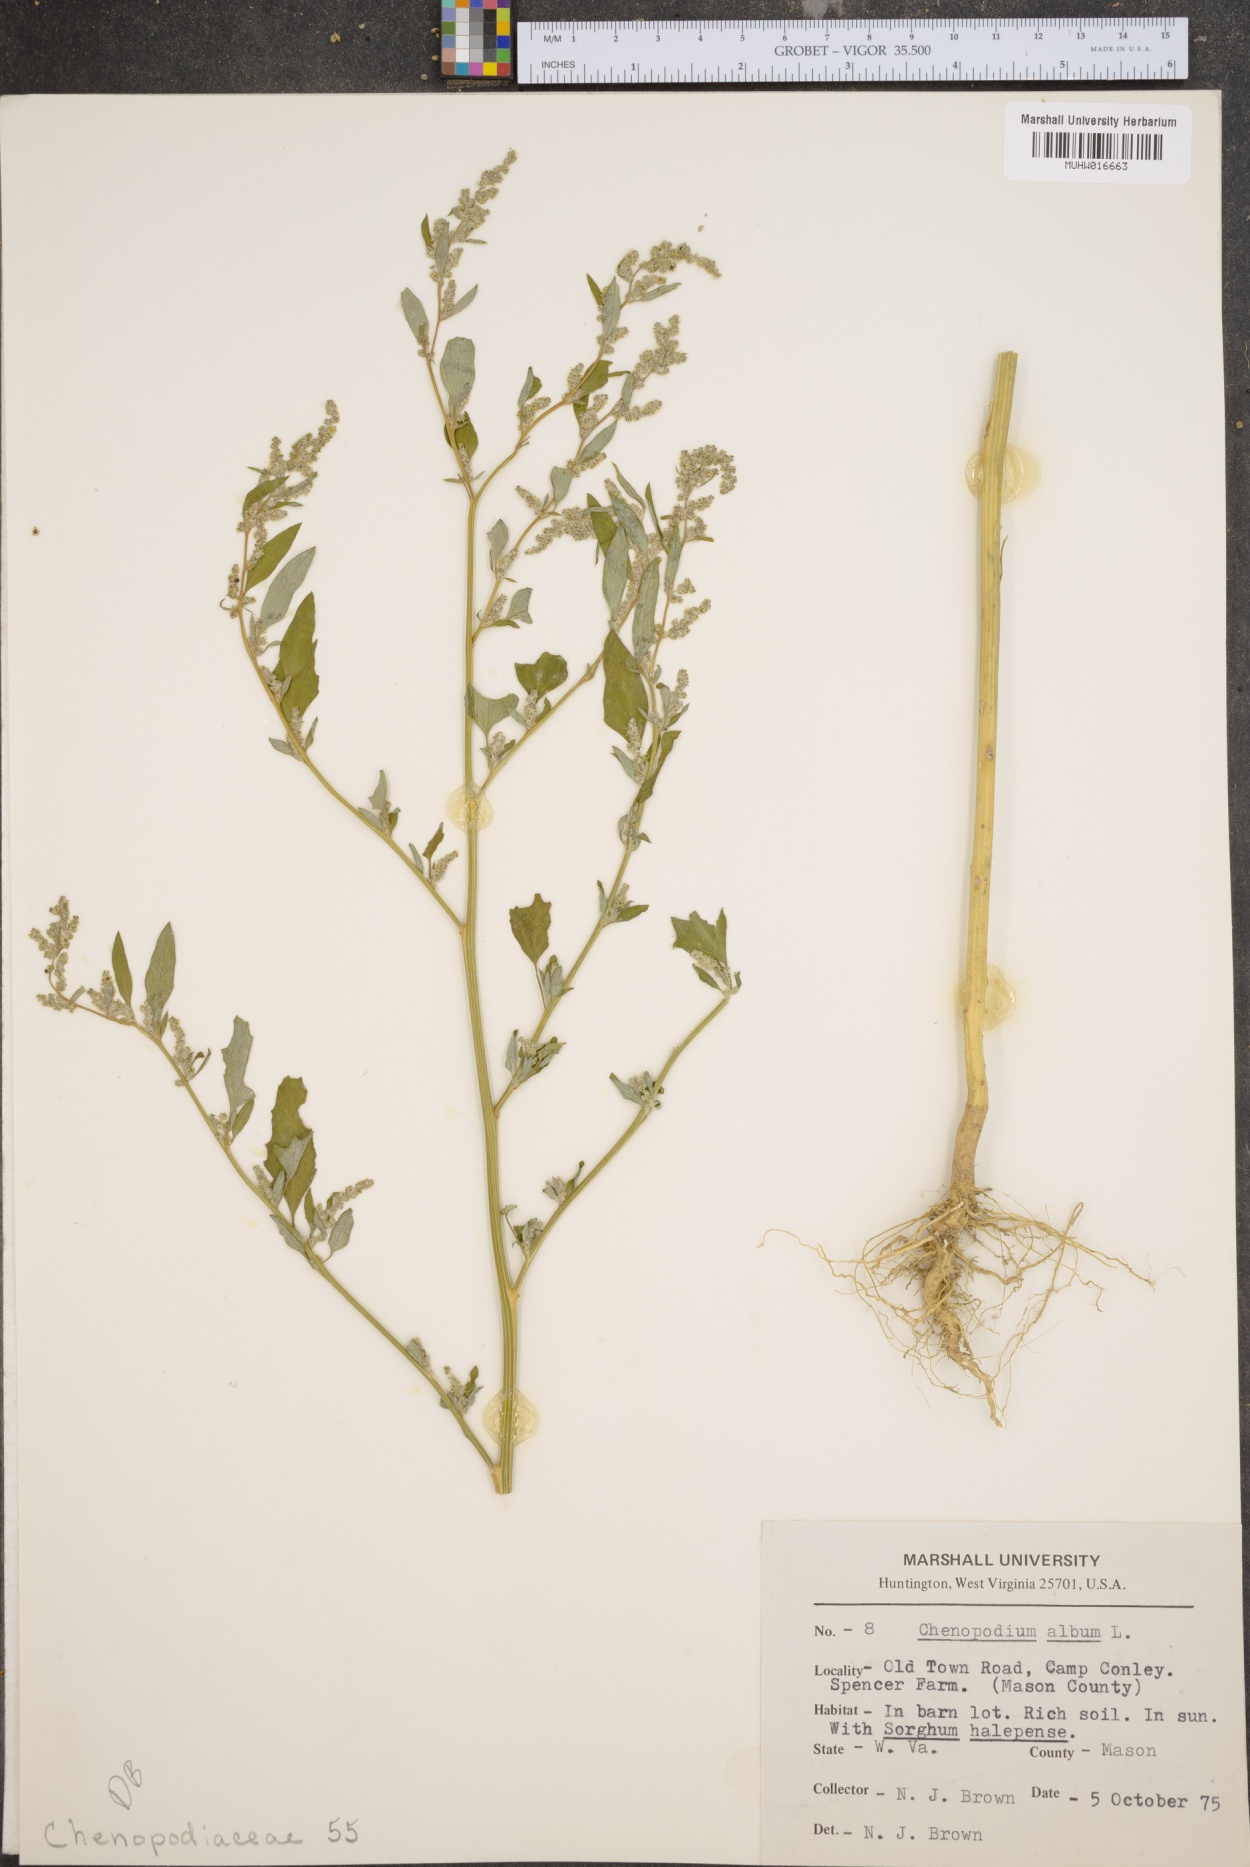
Sample by Nancy Brown, MU Herbarium
Herbariums use 100 percent rag paper (usually 11 1/2 by 16 1/2 inches) and white library glue. Rag paper is expensive and hard to obtain (available from some biological supply houses), so you will probably want to use a good quality, fairly stiff white paper instead.
Arrange the specimen on the paper and place dabs of glue in several places to hold it down securely.
Make a clean copy of the identification card and attach it to the paper in the lower right-hand corner.
Put the mounted plant in the freezer for a few days to kill any insects.
If you plan on framing plant specimens, you can use a similar mounting method. However, you can also get creative with different background color, double glass frames, and more. A professional tip to remember is that they need to be protected from UV light exposure. This can cause the natural plant pigments to degrade and the sample to change color. I recommend using glass with a UV blocking coating.

This might be a bit more complicated than the old book pressing method you might have done as a child. I still occasionally find leaves stuck between pages in my own books. This method won’t damage your books, and the results will last much longer. Also, you get a beautiful piece of natural art in return.
